Thursday, December 30, 2010

Gluten-Free Bisquick Review

IMG_3011

A few weeks ago while I was shopping for baking groceries at Target, I stumbled upon the new Gluten-Free Bisquick. I didn't even think twice, I just grabbed it to give it a try! It's main ingredient is rice flour and, I gotta tell ya, I don't like rice flour very much. I feel that it gives everything a very gritty texture that bothers me when I eat it. So I was not expecting to like the outcome, but it turned out I really liked what I made with it!

IMG_3018

First, I made waffles exactly following the recipe on the box. They were great. Surprisingly light and fluffy. I got 5 small Belgium waffles out of it and was very pleased! They were fast to make and really good!

IMG_3019

Yum!

_MG_3023

Then this afternoon I wanted to try the biscuits. I have to tell you that the thing that I was not happy about was the quantity of mix. I had used 1 1/3 cup of mix for the waffles and needed 2 cups for biscuits. There was only a cup and a little extra left after the waffles so I made half a batch of biscuits. I think this is a bit of a rip off! There should be enough mix in there to make at least 2 DIFFERENT ITEMS!!!

The biscuits did turn out very well though, the whopping 5 of them it made!

_MG_3024

They were very light and fluffy which I found really impressive.

I believe the box cost me around $6 at Target (sorry, I have no idea where my receipt is and I've learned with gluten-free shopping to not really look at the price tag or else it gets depressing!). So I'm not sure if $6 for 5 waffles and 5 biscuits is worth it, but it definitely tasted good. I am really impressed that it has a good texture considering that it's mostly rice flour.

Overall, just be aware that there is not very much mix inside of that box, but that you will probably be pleased with the results if you do buy it!

Tuesday, December 28, 2010

Glutenfreeda Burritos

IMG_3005

Oh my goodness, a gluten-free burrito?!?! I seriously flipped out when I just found these "IMG_3010"">Glutenfreeda Burritos at Mother's Market. I haven't had a burrito since before I was gluten-free so about 8 years. So I happened to see this in the freezer section of my local Mother's Market and had to try one. I tried the Vegetarian Bean & Cheese flavor. I had it for dinner tonight once I got home and it was really good. I highly recommend it and will soon be purchasing any other flavors I can get my hands on.

IMG_3006

The tortilla was very good, it's made with corn, rice and potato flours as well as a few other ingredients. The bummer for me was that there were actual corn kernels in it and I can't eat whole corn kernals. I can occasionally eat it ground up in tortillas but I was able to easily pull out the corn kernels! Again, this is only if you have problems with corn - it's not at all related to gluten!

IMG_3010

It has rice and all sorts of great flavors. It was a little tiny bit spicy, but I can't eat anything spicy so it wasn't overly spicy if I could eat it and enjoy it!

The price at my store was $3.19. For the size of the burrito, it's higher than I would like as it would take more than one burrito to make a full meal. However, considering it's gluten-free, fast and can be filling...it was worth it to me!

I don't know about you, but I missed the ease and convenience of a quick and filling microwave burrito that tastes good. I thoroughly enjoyed this and will definitely eat more in the future! I'm also looking forward to trying other Glutenfreeda products when I see them (see the site here). Thanks Glutenfreeda!!

P.S.~Sorry if the pictures of the burrito wasn't super flattering...it's still a microwave burrito but it tasted good and that's all that matters to me!

Gluten-Free in New York-Shake Shack!

Hi Everyone! I'm so sorry for my long absence. I was on a vacation to New York, then very unexpectedly had to move (and quickly!) and then, of course, the holidays! It's been a very hectic but great December!

I wanted to give you a quick little review from one of my absolute favorite places to eat when I'm in New York...the Shake Shack! Yum! I'm sure you're expecting some sort of fancy steak restaurant, but nope, this place is my favorite and I pray that they bring one to Southern California as soon as possible!

So, the Shake Shack started with one location in Madison Square Park and I'm proud to say I went there before it started to spread! Here's a picture of my lunch:


So their burgers are GREAT bunless, the meat actually tastes terrific. The fries are great, not too soggy, not too crisp. The best part is the frozen custard. When I first heard of this, I was seriously nauseated! I thought it sounded so gross. But it is SOOOOO good, I promise! If you like ice cream, you'll love the frozen custard. In the picture above you'll see a "concrete" where they mix the custard with a topping, I had chocolate toffee. Yum yum yum!

The other AWESOME thing about the Shake Shack is that they are so wonderfully awesome about Gluten Allergies! When I ordered my food without a bun, they asked if it was a gluten allergy and I said yes. All over my receipt that goes to the cooking crew were big red letters saying "****GLUTEN ALLERGY****!!! I couldn't have been more pleased!

Of course, it's still eating out and there is always the possibility of cross contamination but it sure makes you feel safer when you see that written all over everything and that they are aware of and understand the allergy is a tremendous advantage to eating out!

For their gluten-free menu, click here. To find all locations (including Miami and various New York areas) and see their main site, click here.

As for price, it's New York City, for all the food shown in my picture above it was about $15.50. Trust me, it was worth every penny both trips I made to the Shake Shack on this visit!

Just to leave you with something festive, this was from our visit to Rockefeller Plaza while it was snowing! Such a beautiful sight and I'm so glad my mom and I got to be together in New York during the Holiday Season!


I swear it was freezing cold and we're from Southern California, so yes, we may be a little over-bundled compared to East Coasters!!!

Thursday, December 9, 2010

Mint Chocolate Delights

_MG_2968

These cookies are a recipe from Nestle Toll House for their Dark Chocolate and Mint Morsels:

_MG_2932

I'm sure that I'm just unobservant and these have been around for years, but please forgive me that this was the first time I've ever seen these and was so excited! I guess I do usually shop at health food stores that don't sell normal name brands (in my defense!). So I had to try something with these so I went with the recipe on the back. So good!!! It's a subtle mint flavor in a wonderfully chocolaty cookie, yum yum!

_MG_2929

Here's what you're going to need!

_MG_2930

First, mix up the dry ingredients: flours, cocoa, baking soda and salt.

IMG_2933

With an electric mixer, cream the butter and sugars until well combined. Add in the vanilla extract and then the eggs (one at a time, beat well between each addition).

IMG_2935

Gradually add in the flour mixture. Lastly, but definitely not least, stir in the Toll House Dark Chocolate and Mint Morsels. Seriously tasty stuff!

IMG_2940

Drop them by tablespoonfuls onto a baking sheet. Bake for 11-13 minutes at 325 degrees until the centers are set on the cookies. Cool on baking sheets for 2 minutes and move to wire racks to cool completely.

_MG_2967

These will make a wonderful Christmas treat. It looks like a regular chocolate cookie and then you get a magnificent minty taste when you bite into it. Thanks Toll House, this is one of my new favorite cookies!

(PS~Nestle Toll House has no idea who I am and is so not paying me to endorse their products!)


Mint Chocolate Delights by Toll House
Prep Time: 15 Minutes
Total Time: 30 Minutes
Yield: 48 Cookies

1 1/2 cups Oat Flour
1/2 cup Tapioca Flour
2/3 cup Unsweetened Cocoa
1 tsp. Baking Soda
1/2 tsp. Salt
1 cup Butter or Butter Substitute
2/3 cup Granulated Sugar
2/3 cup Packed Brown Sugar
1 tsp. Vanilla Extract
2 Eggs

Preheat oven to 325 degrees.

Combine flours, cocoa, baking soda and salt in medium bowl. In an electric mixer, beat butter and both sugars until well combined. Add in vanilla. Add in eggs, one at a time beating well between each addition. Gradually beat in the flour mixture. Stir in the morsels. Drop by tablespoonfuls onto baking sheets.

Bake for 11 to 13 minutes at 325 degrees until centers are well set. Cool on baking sheets for 2 minutes and then transfer to a rack to cool completely.

Enjoy!


Printable Recipe:


Wednesday, December 8, 2010

Rolled Sugar Cookies

IMG_2965

It's not Christmas without sugar cookies, right?! My best friend's mom, Julie, is also gluten-free and is the best because she would send her daughter home from Christmas with gluten-free sugar cookies for me! I asked her to contribute her recipe to this blog and thankfully she agreed, so here it is!

_MG_2921

I used different flours than Julie does so I'm going to give this to you both ways! I also used guar gum instead of xantham gum...but that was only because I was out of xantham gum! I would prefer and recommend xantham gum over the guar gum!

_MG_2922

First, mix up your dry ingredients: flours, xantham gum and salt.

IMG_2924

Next, beat the sugar and butter. Look how beautiful this is! I was amazed at how white it was!

IMG_2925

Add in the egg, vanilla and gradually add in the flour mixture.

_MG_2926

Now you need to refrigerate the dough for at least an hour so it's easier to work with.

IMG_2960

Roll your dough out on a floured surface (I used GF Oat Flour). If it's not rolling well (i.e., breaking apart), it may be easier to press it out with your hand.

IMG_2961

Make fun holiday shapes! Sprinkle (generously!) granulated sugar over the top of all the cookies and bake them at 350 degrees for 10 minutes.

IMG_2962

Yum!

IMG_2965

Decorate with your favorite frosting(s), sprinkles and toppings!!! These taste great and made it really feel like Christmas...thanks Julie!!!


Rolled Sugar Cookies
Prep Time: 20 Minutes
Total Time: 2 Hours (with chilling)
Yield: 36-42 Cookies

2/3 cup Sugar
1 cup Butter or Butter Substitute
1 Egg
1 tsp. Vanilla Extract
1 1/2 cups Oat Flour*
1 cup Tapioca Flour*
1/2 tsp. Xantham Gum
1/2 tsp. Salt

Preheat your oven to 350 degrees. In a medium bowl, mix flours, xantham gum and salt.

In an electric mixer, beat butter and sugar. Add in egg, vanilla and gradually the flour mixture. Beat on low speed until mixed well. Cover and chill the dough for at least one hour.

Roll out the dough on a floured surface, sprinkle the cookies with granulated sugar and bake for 10 minutes. Cool the cookies and frost.

*Alternate Flours: Use 2 1/2 cups total of a Rice Flour Blend made of: 6 cups White Rice Flour, 2 cups Potato Starch & 1 cup Tapioca Flour


Printable Recipe:


Monday, December 6, 2010

Almond Blossoms

IMG_2874

Perhaps you've seen these as Peanut Blossoms, they're a pretty well known holiday cookie. My little 1 year old niece is deathly allergic to peanuts and these are her mom's favorite cookies so I decided to try to create a peanut free version. They turned out great and, personally, I prefer them to the peanut version!

_MG_2856

Here's what you're going to need.

IMG_2859

This is my favorite part, peeling all the Hershey Kisses!

_MG_2861

Next, mix up the dry ingredients: oat and tapioca flours, baking soda and salt.

IMG_2864

Use an electric mixer to cream the almond butter and butter. I used a freshly pressed almond butter from our local market so the only ingredient is almonds. I think this is why it tasted so great!

IMG_2868

Mix in the sugars gradually. Followed by the egg, milk and vanilla. Gradually add the flour mixture.

IMG_2870

You need to be able to roll the dough into balls to roll into granulated sugar. If the dough is too soft to work with, refrigerate until able to use (about 20 minutes).

IMG_2871

Line them up with room to spread on a baking sheet.

IMG_2872

These are going to be good!!

IMG_2873

Bake at 350 degrees.

Here's where we're going to have 2 different sets of directions. If you want to use Hershey Kisses, bake for 10 minutes, add Kisses to the cookies, return to the oven for 3-5 minutes until done.

If you want to use allergen free chocolate, bake for the full 13-15 minutes without putting any chocolates on it.

Remove cookies from oven and let cool on pan on rack 10 minutes. Remove from pan and let cool completely on rack.

IMG_2876

If you would like the allergen free cookie, melt the Enjoy Life Chocolate Chips and place a teaspoon of melted chocolate in the center of the cookies. Use the back of the spoon to spread the chocolate around the cookie.

I promise, these are really good! I actually like these better than the Hershey Kiss version because it more evenly distributes the chocolate!

IMG_2874

I promise either way you go, these cookies will make for a very tasty treat and a great peanut free option to this popular cookie!


Almond Blossoms
Prep Time: 20 Minutes
Total Time: 50 Minutes
Yield: 36 Cookies

1 cup Oat Flour
3/4 cup Tapioca Flour
1 tsp. Baking Soda
1/4 tsp. Salt
1/2 cup Almond Butter
1/2 cup Butter (or Butter Substitute)
1 cup Granulated Sugar, Divided
1/2 cup Brown Sugar
1 Egg
2 Tbsp. Almond Milk
1 tsp. Vanilla Extract
1 Large Bag of Hershey Kisses*

Preheat oven to 350 degrees.

Mix the flours, baking soda and salt in a medium mixing bowl. In an electric mixer, blend the almond butter and butter well. Gradually add 1/2 cup of granulated sugar and brown sugar. Add the egg, milk and vanilla, mix well. Gradually add the flour mixture and beat well. If the batter is too loose to be handled, refrigerate until firm (about 20 minutes).

Roll batter into teaspoon sized balls and roll to coat in remaining 1/2 cup of granulated sugar. Place cookies on a baking sheet spaced at least 2" apart. Bake for 10 minutes. Place 1 (or 2!) Hershey Kisses in the center of the cookie. Bake for an additional 3-5 minutes until light brown and cooked through.

Cool on pan on rack 10 minutes. Remove from pan and cool on rack completely. Enjoy!


*Dairy Free & Soy Free: Eliminate the Hershey Kisses and substitute Enjoy Life Chocolate Chips. Melt 5 ounces of chocolate (1/2 bag) in the microwave. Once the cookies have baked, drop 1 teaspoon of melted chocolate into the center of the cookie. Use the back of the spoon to spread the chocolate over the cookie. Let cool.


Printable Recipe:

Peppermint Bark

IMG_2903

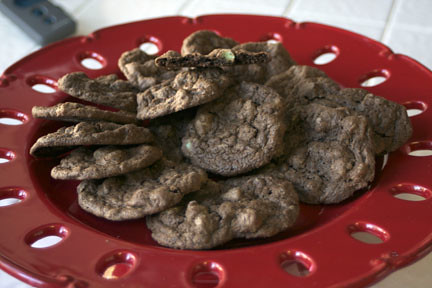
Yeah for Peppermint Bark! I'm so glad it's the holidays so it's time for so many great treats!

I'm going to break this down into 2 different recipes. One regular Peppermint Bark and one that is dairy and soy free (both are, of course, gluten-free).

IMG_2880

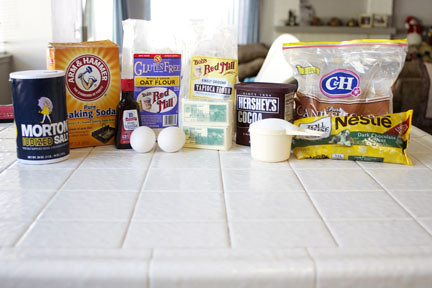
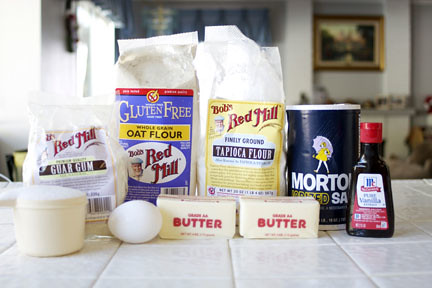
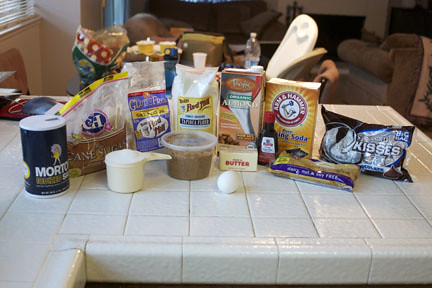
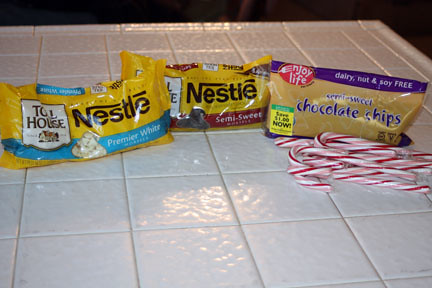
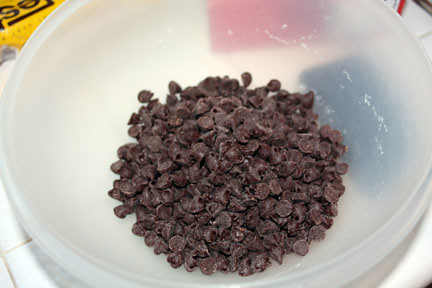
The ingredients for both versions of this recipe!

IMG_2883

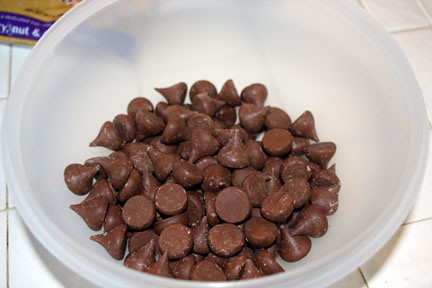
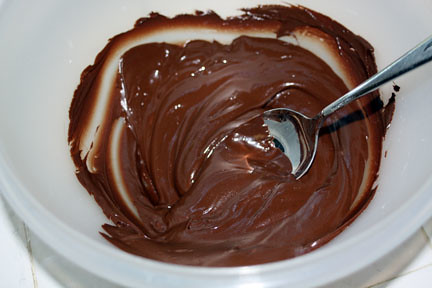
Let's start with the standard peppermint bark. Melt 12 ounces of dark or semi-sweet chocolate chips. Melt in the microwave in 30 second intervals, stirring in between each interval.

IMG_2884

Why do I love melted chocolate so much?

IMG_2887

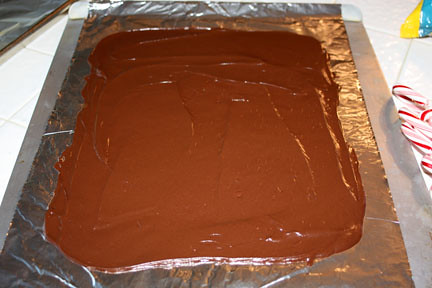
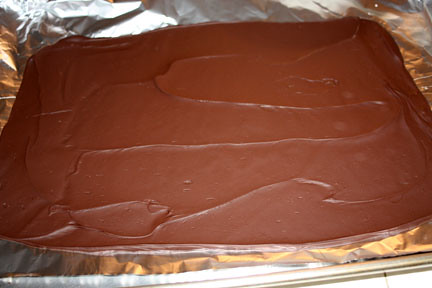
Pour the chocolate on a foil lined baking sheet. Use an offset spatula or back of a spoon to spread the chocolate to a thickness of approximately 1/8" thick.

IMG_2886

The chocolate does not need to go all the way to the edges, you just want it to be the right thickness!

IMG_2893

Refrigerate the chocolate until it is firm, about 10-15 minutes.

IMG_2888

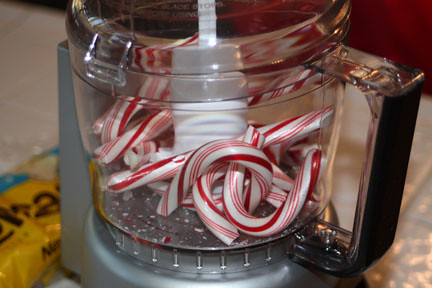
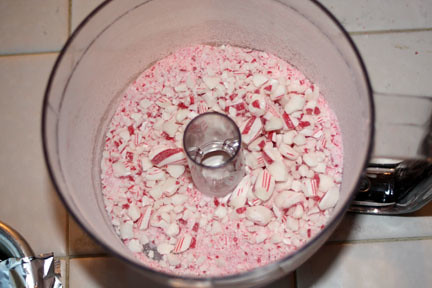
While the chocolate is in the fridge, place 8 candy canes in a food processor. Grind them however large or small you prefer.

IMG_2890

I like them really small and finely ground, but it's definitely a matter of taste!

IMG_2894

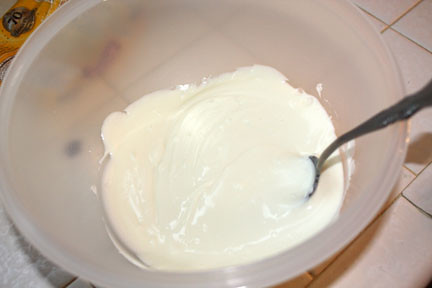
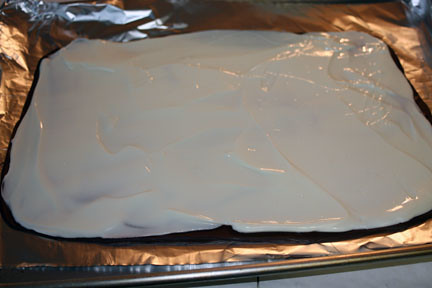
Melt 12 ounces of white chocolate chips in the microwave the same way you melted the chocolate!

IMG_2895

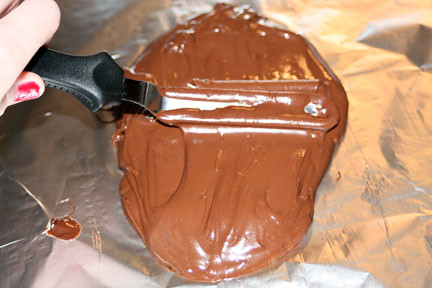
Spread the white chocolate evenly over the dark chocolate. Do it really quick because it will sort of start to melt the chocolate underneath! I learned this from personal experience!! (Sorry for this terribly dark picture!)

IMG_2896

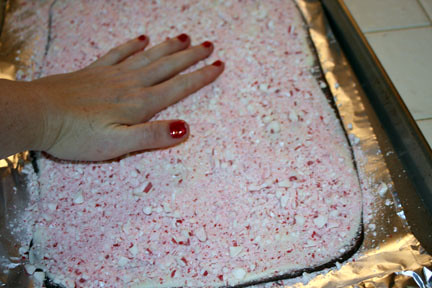
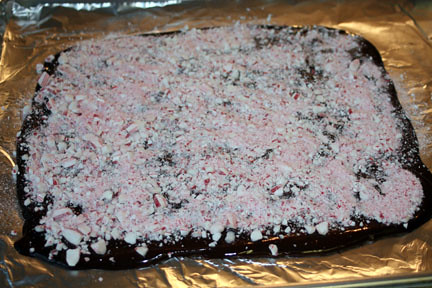
Sprinkle the peppermint pieces over the wet white chocolate and use your hand to gently press the candy into the white chocolate. You want to make sure you get it to adhere to the white chocolate!

Refrigerate until solid. This should only take about 10-15 minutes, but you want to make sure it's nice and set!

IMG_2897

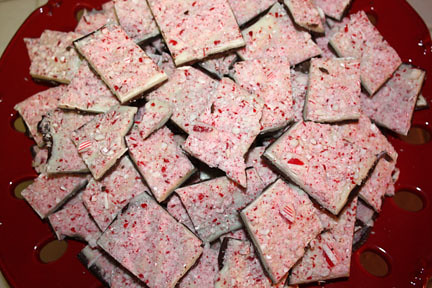
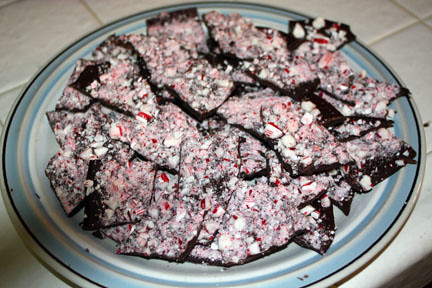
Once completely set, place the bark on a work surface. Peel off the foil.

IMG_2899

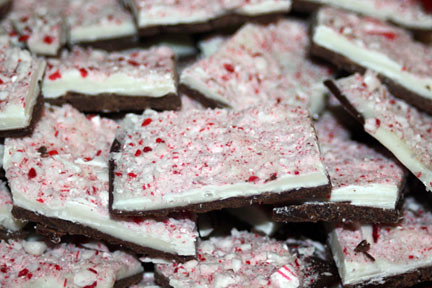
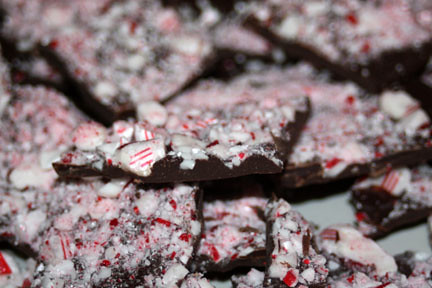
Chop into uneven pieces.

IMG_2903

Oh I love this stuff!!!

IMG_2908

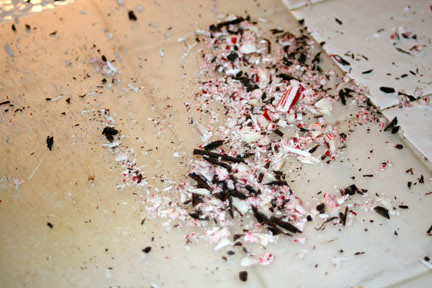
I even love all the extra bits left at the end! What, I would just hate to see things go to waste!!

IMG_2892

My variation for a dairy and soy free version of peppermint bark. Use the allergen free Chocolate Chips and melt the contents of the 10 ounce bag in the same manner as above. Also as above, spread the melted chocolate chips on a foil covered baking sheet. Spread about 1/4" thick because you will not be using any white chocolate. While the chocolate is still wet, sprinkle 7 ground up candy canes over the top and gently press it into the chocolate to adhere.

IMG_2904

Place into the refrigerator and let set. Once set, on a working surface peel the foil off the back and cut into uneven pieces. Serve and enjoy!

IMG_2907

Trust me, it's still great even without the white chocolate. I couldn't find a dairy free and soy free white chocolate.

If you would like white chocolate chips that are dairy free but contains soy, check here.

If you would like white chocolate that is soy free but contains dairy, check here.

Mostly, if any of you know of any dairy free AND soy free white chocolate, please oh please let me know!!!


Peppermint Bark
Prep Time: 25 Minutes
Total Time: 25 Minutes
Yield: Approximately 50, 1"x1" pieces

12 oz. Dark or Bittersweet Chocolate*
12 oz. White Chocolate*
8 Candy Canes

Place foil over a baking sheet. Melt dark chocolate in microwave in 30 second intervals, stirring every 30 seconds. Using a small offset spatula or the back of a spoon, spread the melted chocolate onto the prepared foil lined pan until it is approximately 1/8" thick. Refrigerate 10-15 minutes until set.

Use a food processor to grind 8 candy canes to the desired size. Melt the white chocolate in the microwave as was done for the dark chocolate. Remove the set dark chocolate from the refrigerator and pour the white chocolate over the top. Moving quickly, spread the white chocolate evenly over the dark chocolate. This must be done quickly before the dark chocolate begins to melt and mix with the white chocolate. Sprinkle the ground candy canes over the wet white chocolate. Using your hand, gently press the candy pieces into the chocolate to ensure that it adheres. Refrigerate 10-15 minutes until set.

Once the bark is set, place on a work surface. Peel the foil from the back of the bark. Chop the bark into uneven pieces. Serve and enjoy!

*Soy Free & Dairy Free Variation: Replace the standard dark chocolate and white chocolate with a 10 ounce bag of Enjoy Life Allergen Free Chocolate Chips. Melt as above. Spread on a foil lined cookie sheet until it is approximately 1/4" thick. Sprinkle 7 ground candy canes over the top of the wet chocolate and gently press with your hand to adhere. Refrigerate until set, chop into uneven pieces as above. Yields approximately 25, 1"x1" pieces.


Printable Recipe: