Showing posts with label egg free. Show all posts

Friday, November 19, 2010

Traditional Roasted Turkey & Gravy

IMG_2780

This is a great turkey recipe! It is the moistest (I don't think that's a word, but I'm sticking with it!) and tastiest turkey I've ever had.

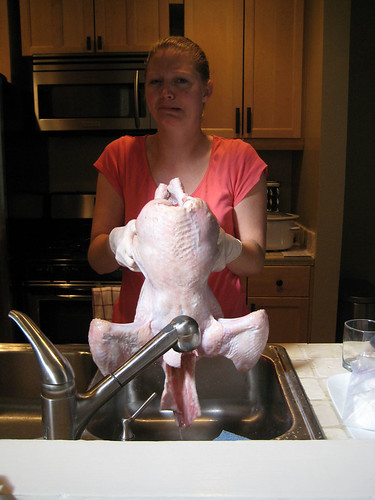
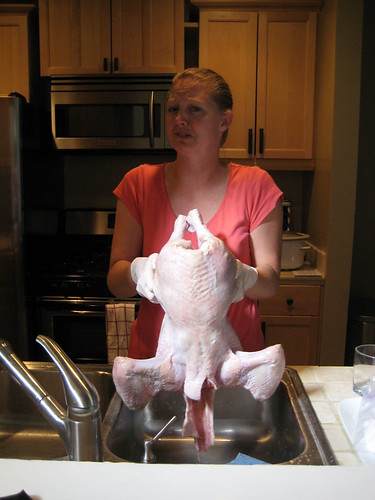
If you feel overwhelmed with the thought of making a whole turkey, you're not alone! I know that I've mentioned before that I don't like raw meat very much...let's just say...a raw entire turkey is so gross to me! I decided to share a couple of pictures with you from the first time I made my own turkey a few years ago...
IMG_1820

Ummm...super grossed out...

IMG_1819

Seriously, ready to lose it! I'd like to tell you that I'm better now, but I'm not much better! I was still gagging during most of the raw turkey prep this time around as well! This is meant to comfort you, I swear! Despite my disgust, I can still turn out a super tasty turkey, just push through the discomfort!
_MG_2748

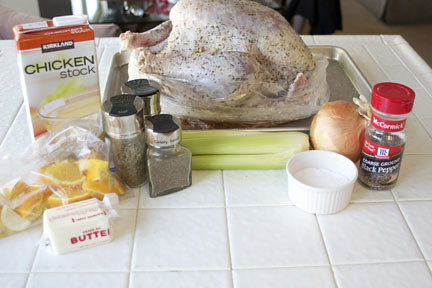
Here's what you will need!

IMG_2720

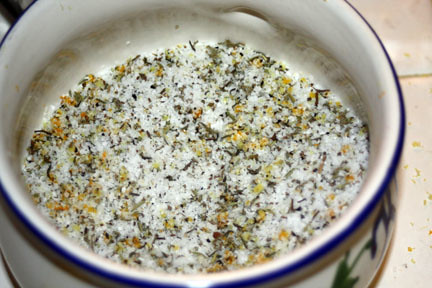
We are going to do a salt brine, so start the turkey the day before you need to cook and eat it! First step is to combine the coarse kosher salt, thyme, majoram, rosemary, celery seeds, sage, orange peel and lemon peel.
IMG_2721

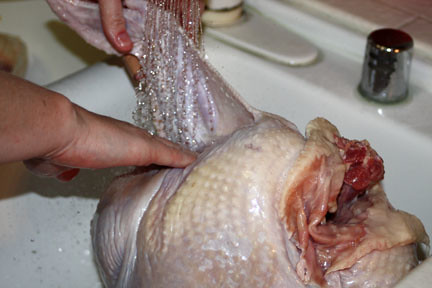
First step, wash the turkey and remove all the innards of the turkey (this is where I run into problems!). You'll notice here, I have washed under his arms very well!

Pat the turkey dry and place in a turkey oven bag on a baking sheet to brine the turkey in.
IMG_2726

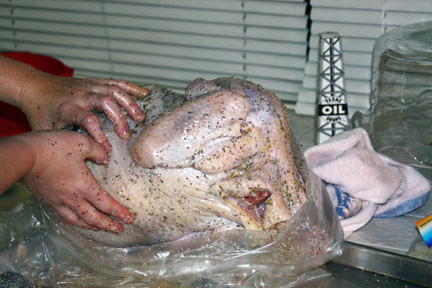
Rub the salt brine all over the outside and inside the cavity of the turkey. Cake it on there, the more the merrier! The great thing about a salt brine is that it makes the turkey so moist after you cook it.
IMG_2727

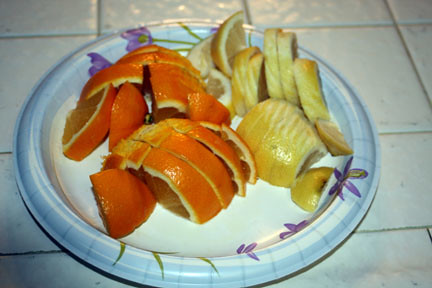
Cut up the orange and lemon that you grated and save them to stuff the turkey with before you cook it.

Wrap up the turkey in the oven bag and place it in the refrigerator. You want to leave the salt brine on the turkey for 12-24 hours.

When you're ready to get the turkey ready to cook, rinse all of the salt brine off of the outside and inside of the turkey. Place the turkey on the rack of a roasting pan.
_MG_2752

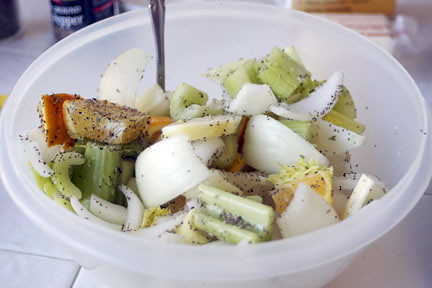
Chop one onion into large pieces, a celery stalk into large pieces and add dried herbs and previously chopped orange and lemon. Mix. Stuff the main cavity and the neck cavity with this mixture. It will make the turkey very flavorful!

Tie the legs loosely using cooking twine to try to keep the stuffing in the turkey.
_MG_2755

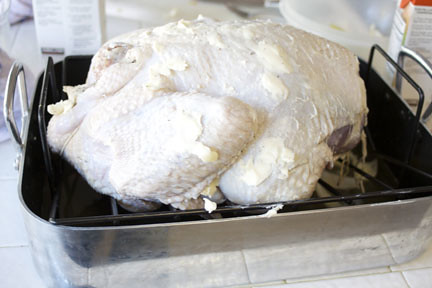
Rub butter all over the turkey. It will depend on the size of your turkey on how much you need to use. Use a lot, you want to butter that sucker up! It will make it so lovely and golden brown. Yum!

Pour 2 cups of chicken stock in the roasting pan. Make sure the bottom of the pan never gets dry.

Place in the oven on the lowest rack at 325 degrees.
_MG_2756

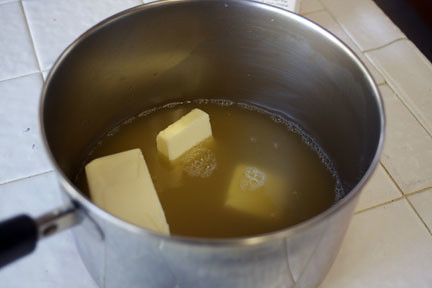
Instead of basting with the pan juices, I like to make a mixture of chicken stock and butter. It's really good! Leave it on the stove on low during the whole time the turkey is baking.
_MG_2766

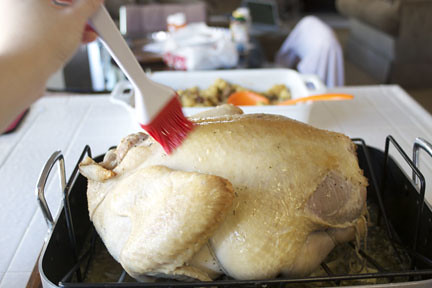
Every 45 minutes, baste very generously with the chicken stock/butter mixture.
IMG_2770

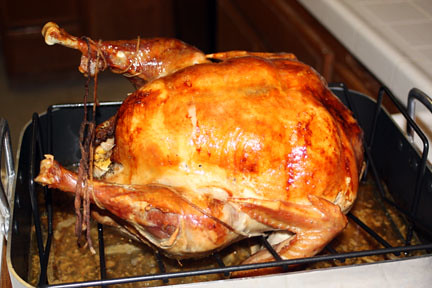
Bake until the turkey temperature at the thickest part of the thigh is 165-170 degrees. Isn't it lovely! Tent loosely with foil and let it sit for a good 30 minutes.
IMG_2772

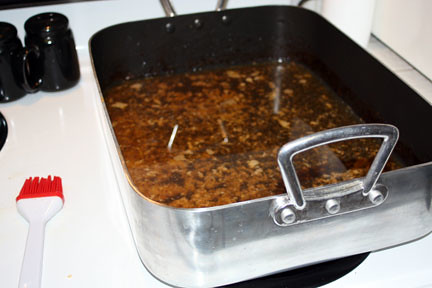
Skim the fat off of the pan drippings. Place the roasting pan on medium-high heat on 2 burners of the stove.
IMG_2773

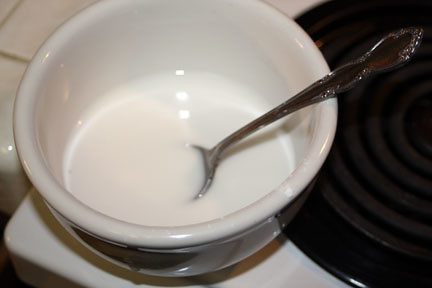
Mix 3 tablespoons of tapioca starch and 6 tablespoons of water. Slowly stir into the gravy.
IMG_2776

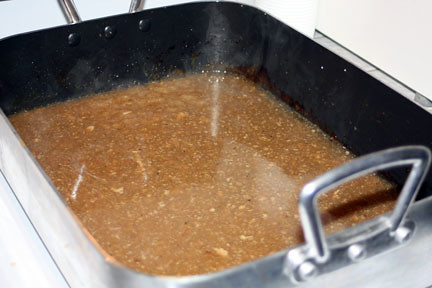
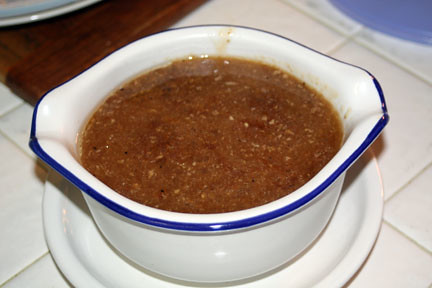
Bring the gravy to a boil and cook to thicken. Taste the gravy and use salt and pepper to taste.
IMG_2778

Serve gravy super hot!

IMG_2780

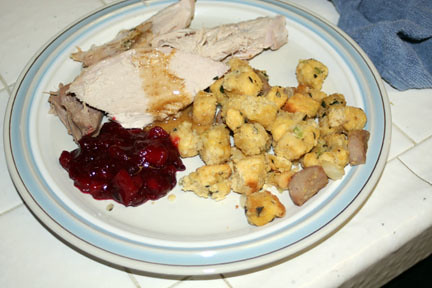
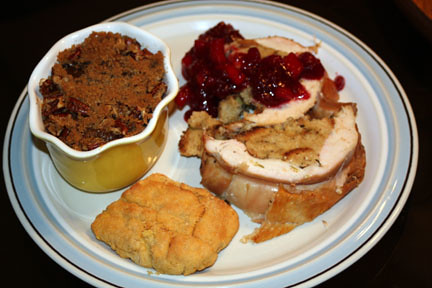
Enjoy your turkey, gravy and whatever other wonderful Thanksgiving treats you've made!!


Traditional Roasted Turkey & Gravy
Prep Time: 1 Hour
Total Time: 5 Hours
Yield: 8-12 Servings

Salt Brine:
1/2 cup Coarse Kosher Salt
1 tsp. Dried Majoram
1 tsp. Dried Rosemary
1 tsp. Dried Sage
1 tsp. Dried Thyme
1 tsp. Dried Celery Seed
1 tsp. Grated Orange Peel
1 tsp. Grated Lemon Peel

Turkey:
1, 13-15 lb. Fresh Turkey
1 Onion, Chopped in Large Pieces
1 Celery Stalk, Chopped in Large Pieces
1 Whole Orange, Chopped with Peel
1 Whole Lemon, Chopped with Peel
1 tsp. Dried Majoram
1 tsp. Dried Rosemary
1 tsp. Dried Sage
1 tsp. Dried Thyme
1 tsp. Dried Celery Seed
4 cups Chicken Stock, Divided
3/4 cup Butter, Divided

Gravy:
Pan Drippings
3 Tbsp. Tapioca Starch
Salt & Pepper to Taste

Mix all ingredients in salt brine. Rinse the turkey inside and out. Remove the innards. Pat dry. Place the turkey in an oven bag on a baking sheet. Rub the salt brine all over the outside and inside of the turkey. Seal the oven bag and place the turkey in the refrigerator for 12-24 hours before cooking.

Preheat oven to 325 degrees.

Chop onion, celery, lemon and orange. Mix with the majoram, sage, rosemary, thyme and celery seeds. Rinse the salt brine off of the turkey, inside and out. Pat dry. Place the turkey on a rack in a roasting pan. Stuff the neck cavity and main cavity with the onion mixture. Tie the legs loosely with cooking twine. Use about 1/4 cup of butter and rub all over the outside of the turkey, use more as needed. Place 2 cups of chicken stock in the roasting pan (make sure there is always liquid in the bottom of the roasting pan throughout cooking). Place turkey in oven on lowest rack at 325 degrees.

Make liquid to baste the turkey with by placing 2 cups of chicken stock and 1/2 cup of butter in a small saucepan. Place saucepan on low heat and make sure the butter has melted by the time you need to baste the turkey. Leave on low heat throughout the turkey's baking time.

Baste the turkey generously with the chicken stock mixture every 45 minutes. Bake the turkey for a total of about 3.5-4.5 hours. This will depend on the size of your turkey. It will be done when a meat thermometer inserted into the thickest part of the thigh registers between 165-170 degrees. Remove from oven and tent loosely with foil. Let the turkey sit for about 30 minutes.

To prepare gravy, skim the fat from the top of the pan drippings. Place the roasting pan with pan drippings on medium-high heat on 2 burners of the stove. Thanks to the basting, there should be plenty of pan drippings. If there are not, add more chicken stock to your desired level. Mix 3 tablespoons of tapioca starch with 6 tablespoons of cold water. Slowly stir the tapioca starch liquid into the pan drippings. Bring the gravy to a boil and allow it to cook to thicken. Taste the gravy, use salt and pepper to taste. If it is not thick enough, continue to thicken with tapioca starch in a 2:1 ratio of water to tapioca starch. Lower the temperature and just let it gently boil until it is time to serve. Serve very hot.

Carve the turkey, serve with gravy and enjoy!

*Dairy Free Version: Use Butter Substitute.

Printable Recipe:

Thursday, November 18, 2010

Cornbread Sausage Stuffing

_MG_2765

This stuffing turned out great, I highly recommend it! Plus, it was easy, who doesn't love that?!?!

_MG_2730

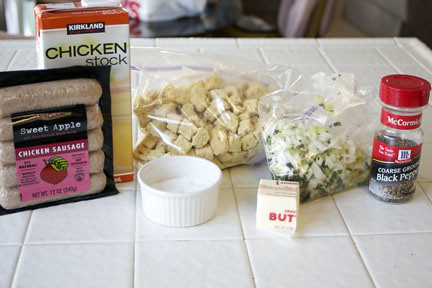
Start with all of this good stuff!

_MG_2745

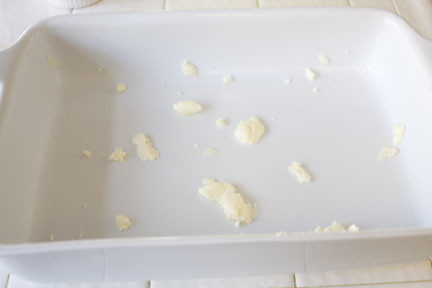
Butter a baking dish with 1 tablespoon of butter. Make it extra buttery!

_MG_2735

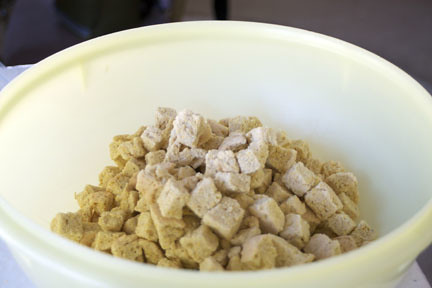
You want to get 6 cups of cornbread croutons. I used the Bob's Red Mill gluten-free cornbread mix and, I'm really torn on how mean to be, but it was not very good. It made great stuffing, but it wasn't good as regular cornbread. I recommend that you use this cornbread recipe from Pamela's. Also, if you can't eat corn, use whatever your favorite GF bread is, this will still be a terrific recipe!

Make your cornbread or bread, cut them into 1/2" to 1" cubes, spread into a flat layer on a baking sheet and bake for 2 hours at 200 degrees.

_MG_2732

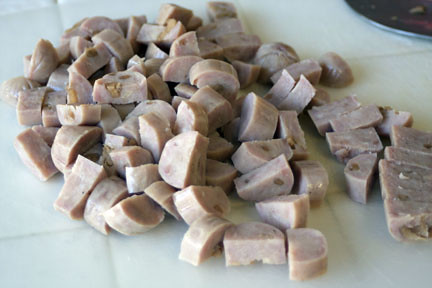
Feel free to use your favorite sausage. I love chicken sausage that has apple and maple in it. Yum! Cut the sausage up into bite-sized pieces.

_MG_2736

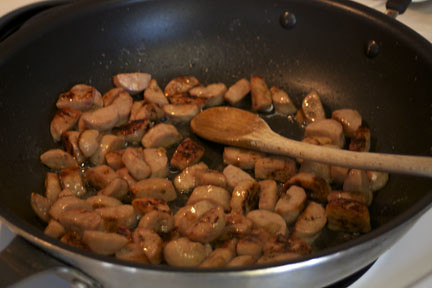
Melt 2 tablespoons of butter in a large frying pan over high heat. Cook the sausage until it browns. Try not to eat it all because it is going to smell really good!

_MG_2737

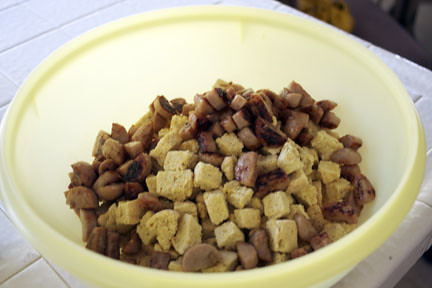
When the sausage is done, add it to your cornbread croutons.

_MG_2743

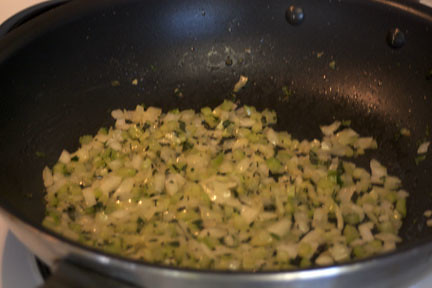
Just as with the herb bread stuffing, I had already chopped the herbs, onion and celery. Dice 2/3 cup of celery, 1 cup of onion and 1 tablespoon each of fresh sage, parsley and thyme.

Melt an additional 2 tablespoons of butter in the same frying pan you used for the sausage. Cook until the onions and celery become translucent and are beginning to brown.

_MG_2744

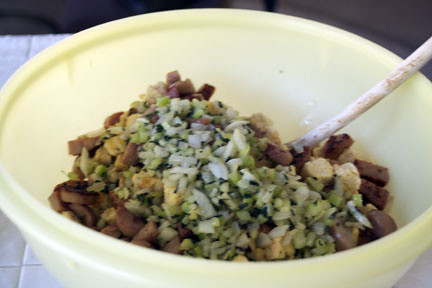
Add them to the sausage and croutons.

_MG_2738

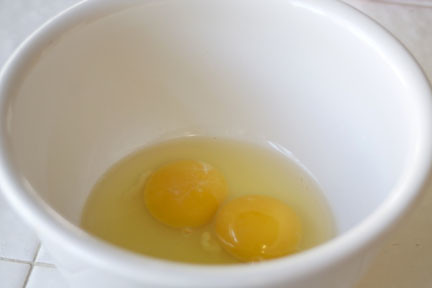
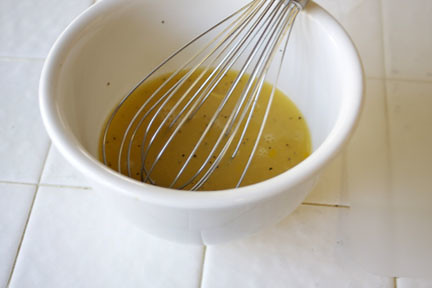
While everything is cooking on the stove, whisk up the wet ingredients. Start with two eggs.

_MG_2739

Add in 1/2 cup chicken stock, 1 teaspoon of salt and 1/2 teaspoon of black pepper. Whisk it up!

_MG_2746

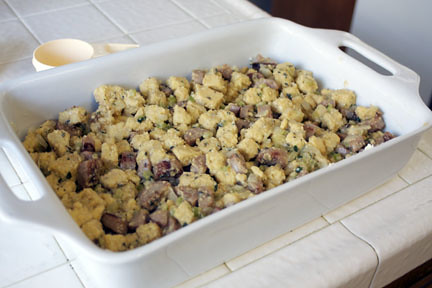
Pour the wet ingredients over the sausage, vegetables and croutons and mix well (but gently, don't mush up the bread!). If it is not moist enough, add chicken stock in 1/4 cup increments until very moist. Just when you think it's moist enough, it's probably not, add some more!

_MG_2747

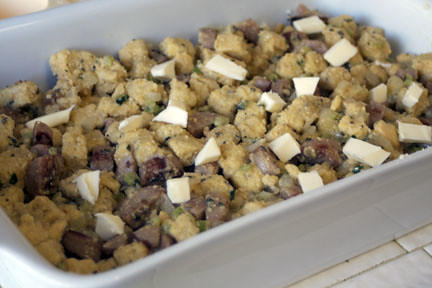
Cover the top with little pieces of butter, just to make it extra moist!

Bake at 350 degrees for 25-30 minutes.

_MG_2759

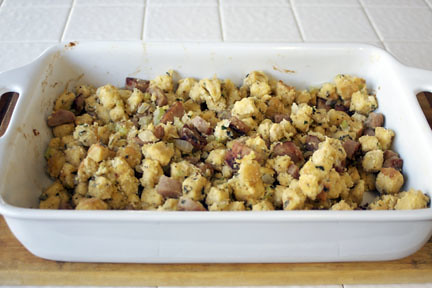
Remove from oven when it's golden brown. If you remove it from baking and it's too dry, add additional chicken stock. Mine was too dry and I just added an extra 1/4 cup of chicken stock directly to the stuffing while still in the baking dish and mixed it up. It was perfect, so feel free to fix it after the fact if you need to!

_MG_2765

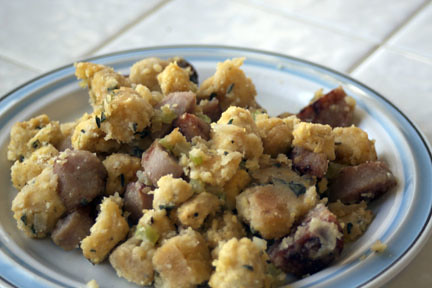
This is really good stuffing! I think the sweet sausage made it a really different taste but perfect for Thanksgiving with its maple flavor!


Cornbread Sausage Stuffing
Prep Time: 30 Minutes (45 Minutes if Making Croutons)
Total Time: 1 Hour (4 Hours if Making Croutons)
Yield: 10-12 Servings

6 cups, Gluten-Free Cornbread Stuffing Croutons
12-ounces Gluten-Free Sausage (i.e., Chicken Apple Sausage)
1 cup Diced Onion
2/3 cup Finely Diced Celery
1 Tbsp. Chopped Fresh Sage
1 Tbsp. Chopped Fresh Thyme
1 Tbsp. Chopped Fresh Parsley
6 Tbsp. Butter
1/2 - 1 1/4 cups Chicken Stock
2 Eggs
1 tsp. Salt
1/2 tsp. Black Pepper

Make gluten-free cornbread croutons by making your favorite gluten-free cornbread mix. Chop the cornbread into 1/2" to 1 " cubes. Place cubes in a single layer on baking sheet and bake at 200 degrees for 2 hours. This can be done 1-3 days in advance, store croutons in an airtight container and store it at room temperature.

Preheat oven to 350 degrees. Butter 9 x 13 baking pan with 1 tablespoon of butter.

Chop vegetables and herbs, this can be done 1-2 days in advance and stored in an airtight container in the refrigerator.

Chop sausage into bite-sized pieces. Melt 2 tablespoons of butter in a large frying pan on high heat. Add the sausage and cook until browned. Mix with cornbread croutons in a large bowl.

Melt an additional 2 tablespoons of butter in the same pan used for the sausage. Add the onions, celery and herbs. Cook until onions and celery become translucent and are beginning to brown. Add to the sausage and croutons.

In a small bowl, whisk eggs, 1/2 cup chicken stock, salt and pepper. Add to the crouton mixture. Mix well but gently. If stuffing is dry, add chicken stock in 1/4 cup increments until mixture is very moist. Place stuffing in prepared 9 x 13 pan.

Cut up last tablespoon of butter into small pieces and place on the top of the stuffing. Bake for 25-30 minutes at 350 degrees until stuffing begins to brown. Remove from oven, serve hot.

*Dairy Free: Use Butter Substitute
*Egg Free: Substitute 1 cup of chicken stock for the 2 eggs. Use Egg Substitute when making cornbread mix.

Printable Recipe:
Sunday, November 14, 2010

Cranapple Sauce

IMG_2705

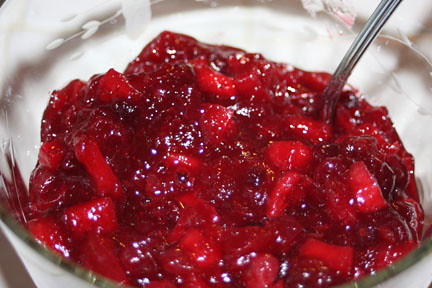
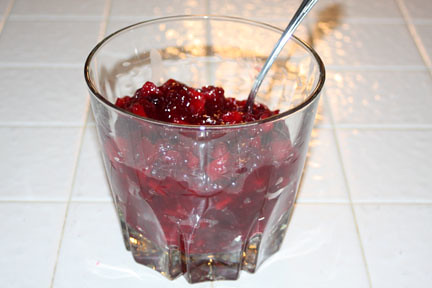
Try this cranberry sauce for Thanksgiving, it's great! It's cranberry sauce but with some apples and cinnamon added in. It's tasty!

IMG_2652

The ingredients...well...almost all of them. I forgot to put cinnamon in this picture, please forgive me!

IMG_2653

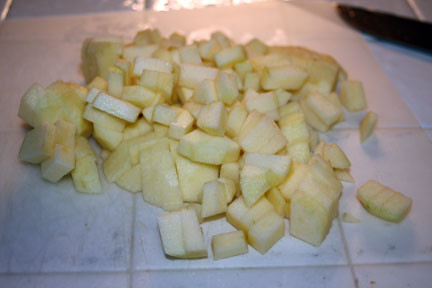
First, peel, core and dice two apples.

IMG_2654

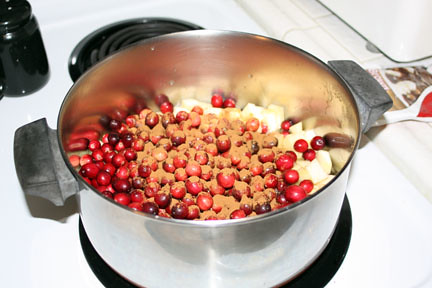
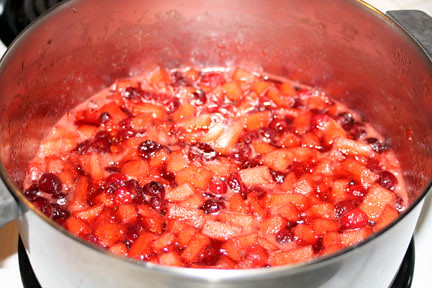
Bring 1 cup of water mixed with 1.5 cups of granulated sugar to a boil. Once boiling, add cinnamon, apples and cranberries. Stir occasionally, for 10-15 minutes until apples are soft.

IMG_2656

Yum!

IMG_2706

Pour into a bowl and cool until room temperature.

IMG_2705

Cool in refrigerator until ready to use. Can be done 1-2 days in advance.

IMG_2717

Serve with turkey (or on roasted pork loin...I love cranberry sauce on roasted pork loin. Is that weird?)!


Cranapple Sauce
Prep Time: 10 Minutes
Total Time: 25 Minutes
Yield: 10-12 Servings

1, 12 ounce bag Fresh Cranberries
2 Large Fuji Apples
1 1/2 tsp. Cinnamon
1 1/2 cups Granulated Sugar
1 cup Water


Core, peel and dice apples.

Bring 1 cup of water and 1 1/2 cups of granulated sugar to a boil in large saucepan on medium high heat. When boiling, add cranberries, apples and cinnamon. Reduce heat to medium and gently boil until apples are soft, about 10-15 minutes.

Transfer sauce to a bowl and cool to room temperature. Once cooled, seal and store in refrigerator until ready to serve.

Serve with turkey and enjoy!


Printable Recipe:

Friday, November 12, 2010

Review: Skinny Crisps Crackers

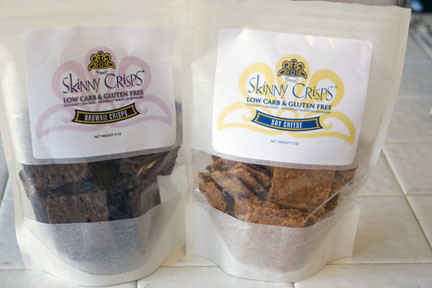
Do you need a great GF cracker? Check out these Skinny Crisps:

_MG_2625

These are really tasty and low in carbohydrates. I get them at Whole Foods but you can order them at the Skinny Crisps website!

They are very crunchy but packed full of flavor. The brownie crisps are amazingly chocolaty and taste fantastic:

_MG_2626

Do you see those chocolate sprinkles!!!!

The Plain Jane flavor reminds me of what I remember a Wheat Thin tasting like (not that I'm an expert on what a Wheat Thin tastes like at this point!!).

The ingredients can be found here for all of the different flavors to see if they work for you.

Every flavor I've tried is terrific!!! I highly recommend them. They are also made with nuts and beans so they have protein making them a very terrific and satisfying snack!

The only downside is that they are a bit expensive. Great for a special treat though when you really need a tasty cracker!


*Please Note: The manufacturers of Skinny Crisps do not know me and do not pay me to say these nice things about them!!!
Thursday, November 11, 2010

Chicken Enchiladas

_MG_2327

I LOVE MEXICAN FOOD! It's seriously what I live on. Not that I claim to be able to cook "authentic" food. I'm sure mine is the American version, but this is still super good, I promise!

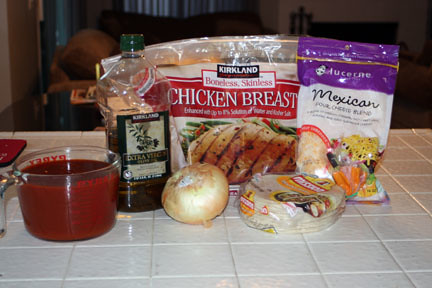
Ench Ingredients

The ingredients.

_MG_2292

Begin by boiling 4 boneless, skinless chicken breasts until cooked through.

_MG_2279

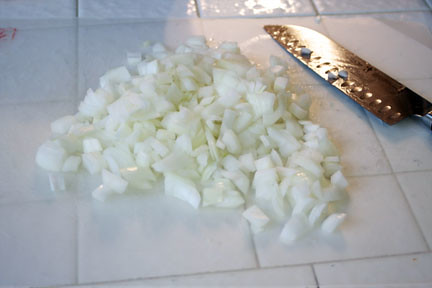
While the chicken is boiling, chop up one onion.

_MG_2287

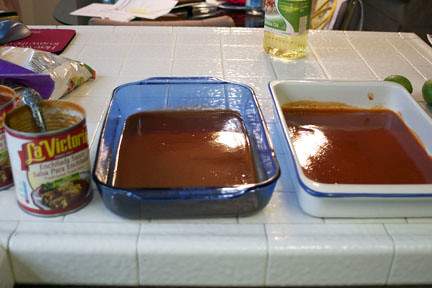
Spread enchilada sauce on the bottom of two 9 x 13 pans. The sauce shown has soy in it. I provide a soy-free recipe here if you need to make your own sauce. I now make my own sauce and freeze it in bulk so I can make enchiladas whenever I want and have sauce on hand!

_MG_2294

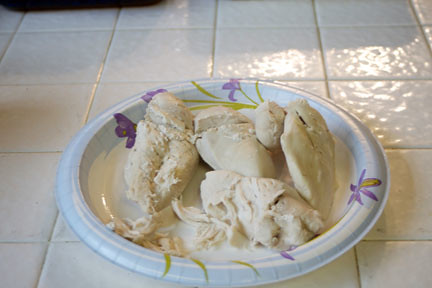
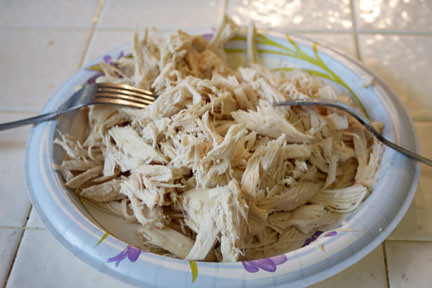
When the chicken is done, shred it using two forks and pulling in opposite directions.

_MG_2298

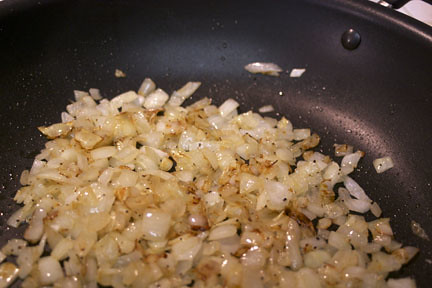
Pour 1 tablespoon of olive oil into a large frying pan. Fry the onion with salt and pepper to taste.

_MG_2299

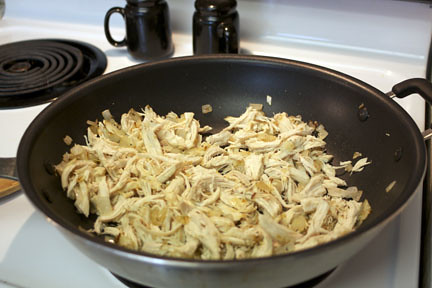
Once the onion is caramelized, add the chicken. Cook until the chicken starts to brown. Remove from heat.

_MG_2300

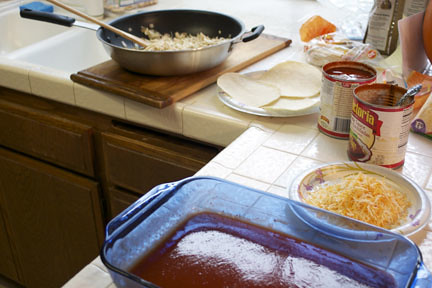
Set up a little enchilada assembly station (yes, I'm pretty sure that's the technical name!).

_MG_2301

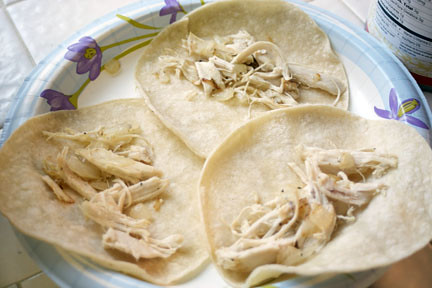
So I do 3 at a time. I microwave the tortillas for 30 seconds (this makes them easy to roll and the tortillas don't crack!), add the chicken mixture...

_MG_2303

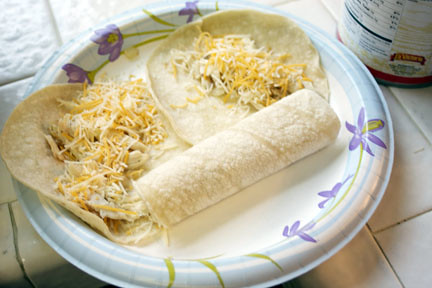
Add the cheese and roll.

_MG_2305

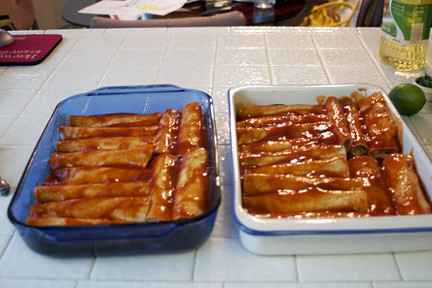
Place each enchilada seam side down into the prepared pans. Continue until you have used all of your chicken mixture! If you still have some extra space and extra tortillas, make some cheese enchiladas to fill the space by simply filling tortillas with cheese and rolling them up! You'll be glad you did!

_MG_2306

Spread enchilada sauce over the enchiladas.

_MG_2307

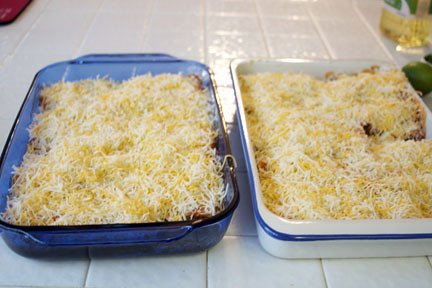
Cover with lots and lots of cheese. Ummm, love it. Want some right now!

_MG_2309

Bake at 350 degrees for 20-25 minutes until the cheese is all melted and starting to brown.

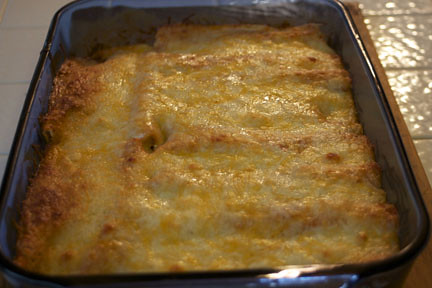
_MG_2327

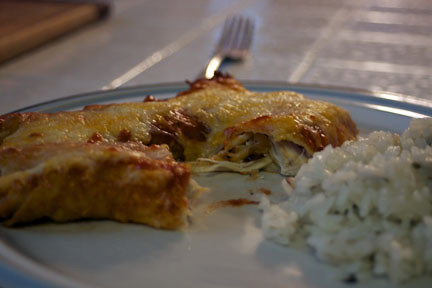
Until it looks like this!

_MG_2333

I'm just saying, yum! Serve with some cilantro lime rice and maybe some refried beans or a salad and you are all set! Plus, these enchiladas freeze very well and make terrific leftovers!


Chicken Enchiladas
Prep Time: 35 Minutes
Total Time: 1 Hour
Yield: 28 Enchiladas

1 Package of 30 Corn Tortillas
1 lb. Boneless Skinless Chicken Breasts (approx. 4)
1 Large Onion
1 Tbsp. Olive Oil
2 large cans Enchilada Sauce (or one recipe of Homemade Enchilada Sauce)
Salt & Pepper to taste
2 lbs. Mexican Shredded Cheese

Preheat the oven to 350 degrees. Prepare 2, 9 x 13 baking pans by spreading enchilada sauce on the bottom of each pan.

Boil the chicken until cooked through. Shred the cooked chicken by pulling opposite directions with two forks. Chop the onion and fry in olive oil in large frying pan. Once the onion is caramelized and browned, add the chicken. Cook until chicken begins to brown. Remove from heat.

Begin to assemble the enchiladas. Heat 3 corn tortillas at a time for 30 seconds in the microwave. This will make them much easier to assemble and prevent the tortillas from cracking. Place approximately 1/4 cup of chicken filling on each tortilla and sprinkle cheese over the top. Roll the enchiladas and place in the prepared pans, seam side down. Continue making enchiladas until there is no more chicken mixture left.

Spread enchilada sauce over the tops of the enchiladas. Sprinkle with cheese until covered. Bake for 20-25 minutes at 350 degrees until all cheese is melted and the cheese is browning.

Remove from heat. Serve with cilantro lime rice, beans and/or salad. Enjoy!


Printable Recipe: